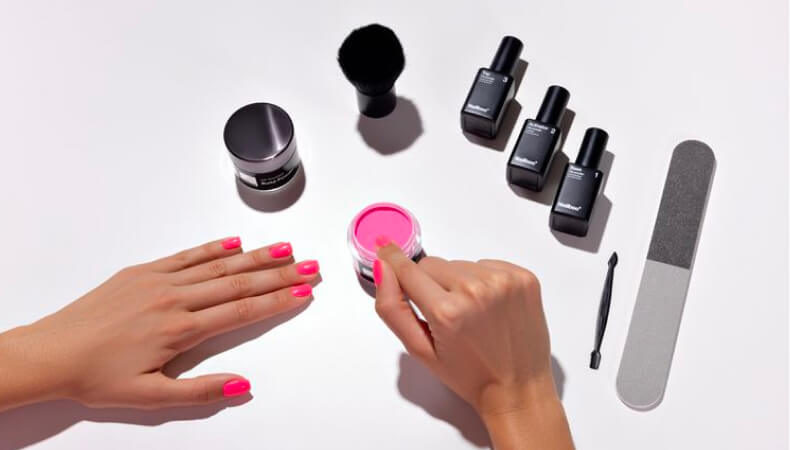
Take the Base Coat liquid and apply a thin layer to about three-quarters of your prepared nail surface. Thin layers of base coat will avoid lumpy nails. Gently stroke it towards the tip of your nail, leaving a small margin on the sides.
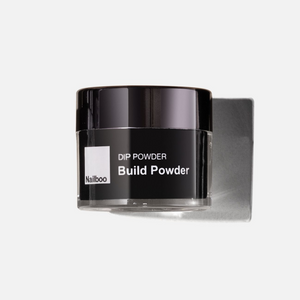
Dip into Build Powder
Hold your nail at a 45-degree angle and immediately dip it into the powder. Tap off any excess powder. Remember, work on one finger at a time and ensure you dip it immediately after applying the Base Coat.
Brush Off Excess Powder
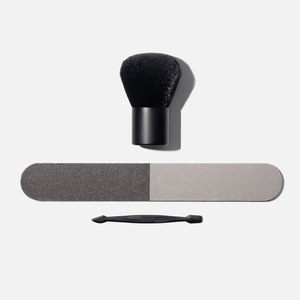
Allow the Base Coat to absorb the powder thoroughly. Once you've dipped one hand, it's time to brush off the excess powder. Use a fluffy brush and gently remove any loose powder left on the nails after dipping.
Dip Into Nailboo Color
Choose the color powder you desire and give it a good stir and shake. This helps ensure an even color application by making the powder less dense and ensuring pigment consistency.
Apply another thin layer of base coat and dip the nail immediately after applying the base coat layer. It's important not to apply dip powder too close to your skin. Overlapping the powder onto the skin can cause cracking over time. Use an orangewood stick to carefully run around the cuticle line, cleaning up any excess dip that might have gotten stuck there. This ensures a clean finish and a nice, neat line for your nails. This trick works best immediately after dipping when the base is still wet.
Apply Second Color Layer
Now, let's apply another layer of Base Coat, this time, a hairline away from the cuticle.
Get a tiny bit closer to the cuticle as you apply a second and third coat of color. This technique helps in building a natural shape without any excess bulk and will help avoid flooding the cuticle.
Once you've dipped your finger in the powder, check for any areas that still appear wet. If so, you can re-dip to ensure complete coverage. Always remember to brush off excess powder to avoid contaminating the liquids.
Apply Activator Coat
Apply Activator generously to all five nails. This step is crucial for setting and curing the powder, preventing chipping or lifting. Ensure all layers are thoroughly saturated.
File and Shape Nails
File and shape the nails, any mistakes can be corrected at this point to ensure your nails look flawless. Use all four sides of the file, starting from the darkest (coarse) to the lightest side, to achieve the desired shape. For a smoother, shinier finish, buff the nails further before applying the top coat.
Apply Second Layer of Activator
Apply Activator to all 10 nails with minimal strokes. This aids in drying the Top Coat. Don't wash hands at this stage; use a brush to sweep away any filing dust.
Apply Top Coat
Take the Top Coat and apply the first layer with precision, using three quick strokes and avoiding excess pressure. Allow it to dry for about 2 minutes.
Follow up with a second Top Coat layer, applying it more precisely and slightly over the edges for enhanced durability. Allow nails to air dry completely, avoiding fans or cold water.
Hydrate Hands and Cuticle
After the top coat is fully dried, wash hands, and apply skincare products to hydrate and nourish cuticles.
Build Powder creates a stronger foundation for your color powder and prolongs the wear time. Build Powder can be used as a last layer to encapsulate glitter or color powders to protect them from filing and buffing. If you feel like your nails are naturally strong, and you are not a fan of the added thickness you can skip it.
We recommend you to continue using it if you ever had a chipping or cracking issues in the past. Sometimes our dip manicures are too thin for our lifestyle. Build up your nails to support the whole nail length. Use 1-2 layers of Build Powder and 2-3 layers of color powder if your nails need extra strength.
We recommend starting with one coat of Build Powder on 3/4 of the nail and two coats of color powder for your first manicure, then adjusting up or down to suit your preference. That’s what so great about doing your own nails - everything can be customized to your own needs.
Your DIY Nailboo dip mani (with proper prep, application, and after-care) can look flawless for up to six weeks.
This can happen due to a variety of factors:
Make sure you're applying very thin layers of the base liquid and allow the powder to dry before brushing off.
Apply Activator generously to harden the layers. Use enough to make sure all the powder layers are saturated.
If you are trying to activate too many layers at once or layers are too thick, the activator may not penetrate completely.
Give it some more time - some very pigmented colors may take a longer time to dry.
Your activator might be old or contaminated with powder. Check if you can see any powder inside the bottle and make sure to never put dirty brushes inside the bottle.
For extended storage life store your products in cool and dry place away from direct sunlight and light sources. Securely close the lids of the bottles and jars. Avoid exposure to sunlight and UV light. Store liquid bottles in an upright position. Before putting away mani liquids make sure that brushes and neck of the bottles are clean.
Tip: You can choose to add a small drop of oil on the outside threads of the bottle to make it easier to open next time you use it.
Dip base coat and Top coat harden from contact with step 2 Activator, moisture(water), or long air exposure. Cross-contamination can happen from acetone getting in the bottles during cleaning, leftover Activator getting on a Top Coat Brush, or dip powder getting transferred to Base coat bottles. You should also avoid exposure of liquids to air for long periods.
Here are some tips that can help you avoid uneven dip surface.
Stir and shake the powder. This makes the powder less dense and ensures pigment consistency.
Control the amount of base liquid on your brush. Always use a thin layer of base coat. Wipe off excess on the inside of the bottle
Hold the brush parallel to the nail.
Make sure the base is even. Start 3/4 of the nail and push towards the cuticle.
If you had problems with the rippling effect try pouring the powder over the nail instead of dipping.
Guide the nail into the powder at a 45-degree angle to ensure a smooth surface.
Remove ALL excess powder after each dip.
Shape the nails after activating to avoid them looking bulky
Dip flu is the colloquial name given to a set of flu-like symptoms that some people experience when they are sensitive to dip powder or essential liquids. The symptoms can be sneezing, stuffy nose or watery eyes. There are different precautions that you can take to limit exposure to dip powder formulas.
Work in an open and well-ventilated room with free circulation of air.
Work in a well-illuminated room When you do your own dip nails, you're in closer proximity to the dipping products than at the salon. Keep your hand at a safe distance from your face. With good lighting, you can see everything you do better without the need to get closer.
The irritation that occurs after inhaling the scent can be prevented by wearing a face mask.
Wearing glasses or protective goggles can shield your eyes from nail debris and fumes.
Use an old towel or cloth that traps the dust particles and makes it easier to clean afterward.
A humidifier or air purifier can also be used to reduce the number of dust particles in the air.
After application remembers to clean up the whole area. Have a quick vacuum and close all the bottles and dip jars tightly. Use a paper towel with a detergent to cleanse everything properly.
This should not be taken as medical advice. Seek medical counsel for any symptoms.
Nail prep is a key to avoiding the product lifting at the cuticle. There are 3 reasons you might have experienced lifting near the cuticle.
Product applied on the cuticles or skin surrounding the nail. When this happens there is a pocket between the nail plate that can cause lifting as nails grow out.
Leftover cuticle attached to the nail plate. If the cuticle is not fully removed from the nail with the product applied on top, it will create a small gap into which water and other debris can get into over time.
Not fully dehydrating the nail. Make sure to thoroughly wipe the nails with an alcohol wipe or pure acetone to clean the nail plate of any debris and moisture. Fold the wipe in half and go around the cuticle area to get to every spot.
Doing all the steps on one hand then moving on to the next makes the most sense when doing your own nails. This minimizes idle waiting time, resulting in a faster overall process. You can work on the other hand as the first one is drying or curing.